How To Connect
Android
- Open the wireless menu on your Android device
- Select the MSUSecureWireless network
- For "EAP method," select "PEAP"
- If you see an option for "Phase 2 authentication," select "MSCHAPV2"
- "CA certificate" should be Use System Certificates
- For "Identity," enter admin\your MSUNet username
- Leave "Anonymous Identity" blank
- Your password will be your MSUNet password
- In the Domain field enter msutexas.edu
- Select "Connect"
Apple
- Open the wireless menu on your Apple device
- Select the MSUSecureWireless network
- For "Username," enter admin\your MSUNet username
- For "Password," enter your MSUNet password
- Select "Join"
- If you see a "Certificate" screen, verify that it says msu-nps-01.msutexas.edu and then choose "Trust"
Windows
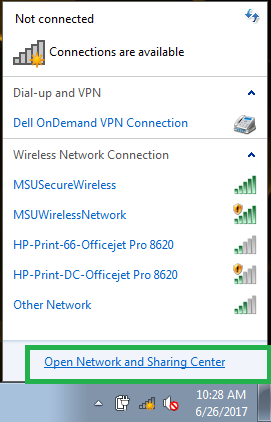
- Open the "Network and Sharing Center" on your Windows laptop or tablet.

- Select "Manage Wireless Networks."

- Select "Add" and then select "Manually create a network profile."

- Enter the network name as "MSUSecureWireless" (without the quotation marks), and make sure "Security type" is WPA2-Enterprise, with "Encryption type" of AES. Click "Next."

- Next, click "Change Connection Settings" and then click the "Security" tab of the Network Properties menu.


- Check that your "Network Authentication Method" is Microsoft: Protected EAP and then click "Settings."

- Under "Select Authentication Method" make sure that Secured password (EAP-MSCHAP v2) is selected, then click "Configure."

- Uncheck the box to "Automatically use..." and click "OK."

- Click "OK" on the Protected EAP Properties menu to close it.
- On the "Security" tab of the Network Properties menu, click "Advanced Settings."

- Check "Specify authentication mode" and select "user authentication in the dropdown box." Click "Save credentials."

- Enter your MSUNet credentials, placing "admin\" (without the quotation marks) in front of your username. Click "OK." Please note that you will have to go back in and change this password manually whenever you change your MSUNet password.

- Exit all open menus by clicking "OK" and then wait for your device to connect to the network.